RPS Settings

Point Creator Settings
For a full description of the Point Creator command Click Here
These settings define Point Creation Styles that are used within the Point Creator command.
The settings for the point creator tool are stored in the RPS Settings folder as defined by the File locations setting. The settings are stored outside the project so that once defined they can be used inside any project thereafter.
Defined styles:
The defined style defines the points that will be created from a wide selection of options. you can create as many styles as you may require, each with different selections of points and intervals as well as naming conventions.
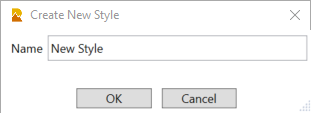
To create a new style click the ![]() button and then enter the style name in the following dialog
button and then enter the style name in the following dialog
To copy an existing style to start the definition of a new style click the ![]() button and then enter a name for the new style in the following dialog
button and then enter a name for the new style in the following dialog

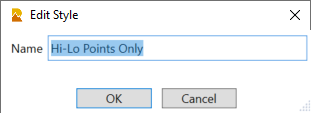
To Edit the name of an existing style, click the ![]() and edit the name of the style in the following dialog
and edit the name of the style in the following dialog
To Save updates or changes to a style, click the ![]() button.
button.
To Delete the selected style click the ![]() button.
button.
Description:
Enter a description for the style for additional detail beyond the style name.
Point ID:
Enter the starting Point ID for the points to be created. The definition provides a template that will be used for all the points to be created. The definition can be a simple Point ID like 1, 1000, 10000 or A1 etc. but it can also include additional information as defined with additional tags as follows. Hover over the ![]() button in the dialog for more details. The codes shown below should all be in upper case letters.
button in the dialog for more details. The codes shown below should all be in upper case letters.
{#} Point number, starts at 1
{#.NNN} Point number, starts at number NNN i.e. {#.10} starts at 10
{#.NNN,INC} Point number, starts at NNN and increments by INC value i.e. {#.10,2} will number 10,12,14 etc.
{NAME} will include the name of the source line for the points i.e. a line called CB will use CB for all of the points on that line. You can use a code set like {#} {NAME} to create Point IDs like 1 CB.
{CODE} will include the key location coding defined below for the point types being created e.g. RP for Radius Point or IP for Interval Point and so on. You can use a code set like {#} {CODE} to create Point IDs like 1 RP.
Restart point numbering with each line checkbox:
Check this checkbox if you wish to reset the Point number to the starting value for each line that you create points for - checking this allows you to number the points along each line in the same way starting from the same value.
Feature code:
You can define the Feature code that will be used for each point created. We recommend that you use one of the following or a combination of the following. Note that we automatically write the source line name into the Description 1 attribute for the points created and the station along the line or the station from the selected reference line or alignment into the Description 2 attribute. Use the key location code {CODE} with or without a Prefix like STK {CODE} for Stakeout Points or CHK {CODE} for As Built Check points etc.
{CODE} to add the key location code for the point e.g. RP for Radius Point or IP for Interval Point etc.
{NAME} to add the name of the source line used to derive the point e.g. CB
{STA} to add the station of the point in relation to the selected reference line or alignment.
Offset distance from reference line:
This value controls how far left and right of the selected reference line that points will be created along selected source lines. If the source line is further away from the reference line than this value, no points will be created.
Key locations along line:
The point creator tool creates points along selected lines and alignments for both horizontal control and vertical control locations for all elements of the lines including straight / tangent, spirals, arcs, vertical arcs and vertical curves. It also creates points at intervals along the line or at stations along the selected reference line and also the High or Low inflection points of the selected lines. You can select any combination of key location types within a style and define intervals as required for that style. For each key location you can enter a code value which is picked up by the {CODE} field in the settings described earlier.
Horizontal locations - Line:
Begin
End
Nodes
Point on Tangent
Station Equation
Defined Stations
Horizontal locations - Arc:
Point of curvature
Point of tangency
Point of intersection
Radius point
Radius point elevation 2D or 3D - select using radio buttons
Incorporate radius value - when checked radius will be added into feature code
Compound curve
Reverse curve
Horizontal locations - Spiral:
Tangent to spiral
Spiral to tangent
Curve to spiral
Spiral to curve
Spiral to spiral
Point of intersection
Horizontal locations - Interval:
Include segment end points checkbox - check to create points at segment endpoints
Straight Interval:
Enter the interval point code e.g. IP
Select the interval method for straight segments from
- Interval value
- Number of intervals i.e. to divide the line segment into a number of parts of equal length
Combine segments checkbox:
Minimum length:
Maximum length:
Curve Interval:
Enter the interval point code e.g. IP
Select the interval method for curved segments from
- Curve to chord - divides the curve based on an arc to chord separation parameter entered in the value field
- Interval value - divides the curve into interval lengths entered in the value field
- Number of intervals i.e. to divide the line segment into a number of parts of equal length based on the value entered into the value field
Enter the Curve to chord offset parameter, the Interval or Number of segments e.g. 5
Note: the ability to enter different interval values for straight and curved sections of lines and the ability to use interval or number (of segments) for curved sections of lines allows you to create stakeout data as needed for these types of element independently.
Vertical locations - Line:
Point of beginning
Nodes / VPIs
Grade break
High point i.e. an inflection point of line segments / VPIs that form a crest
Low point i.e. an inflection point of line segments / VPIs that form a sag
Curve interval
Enter the code for the points to be created at intervals through the vertical curve
Select the interval computation method from
- Curve to chord
- Interval length
- Number of intervals
Enter the interval value i.e. the curve to chord offset parameter, the interval length or the number of intervals depending on the option chosen above.
Vertical locations - Arc:
Point of curvature
Point of tangency
Point of intersection
Radius point
High point i.e. crest of vertical arc
Low point i.e. sag of vertical arc
Vertical locations - Vertical Curve (Parabola):
Point of curvature
Point of tangency
Point of intersection
High point i.e. crest point of vertical curve
Low point i.e. sag point of vertical curve
To return to the RPS Settings Command documentation Click Here