My site improvements are not showing up in my finish design. Very green to the software and trying to teach myself the basics of what I need…I have been successful in the past in doing so, but this one will not work and I can’t figure out why. Just doing generic 12" and 8" adjustment for parking and sidewalk area and trying to apply to finish design.
Thanks!

1 Like
Reasons for this are lokely to be one of the following
-
the lines collectively do not form a closed boundary and thereore cannot en lose a site improvement - there is a tolerance you can set in Project Settings - Computations, Takeoff thatballows you to close out areas even though there are gaps - put in a larger gap closure tolerance and see if tbat fixes the issue
-
some of the lines are on layers that are not categorized as Design in the Categorize Takeoff Layers function. To check right click in your View Filter Manager (in the areas that show layers) and select Show Design Layers only - this will show you lines thatbare categorized as Design.
-
make sure that those layers that ypu have categorized as Design also have the check marks that say those layers contain site improvement boundaries - if that is not set the lines will.act as a part of the design surface but will not be used to constrain site improvement areas.
I am pretty sure it will be one of these three things
Alan
Alan- I appreciate the detailed response. I went back and verified everything you mentioned…I even deleted existing linework and started fresh to make sure everything was closed and just do a trial parking lot closed boundary. Here are a few shots, still no luck.
-
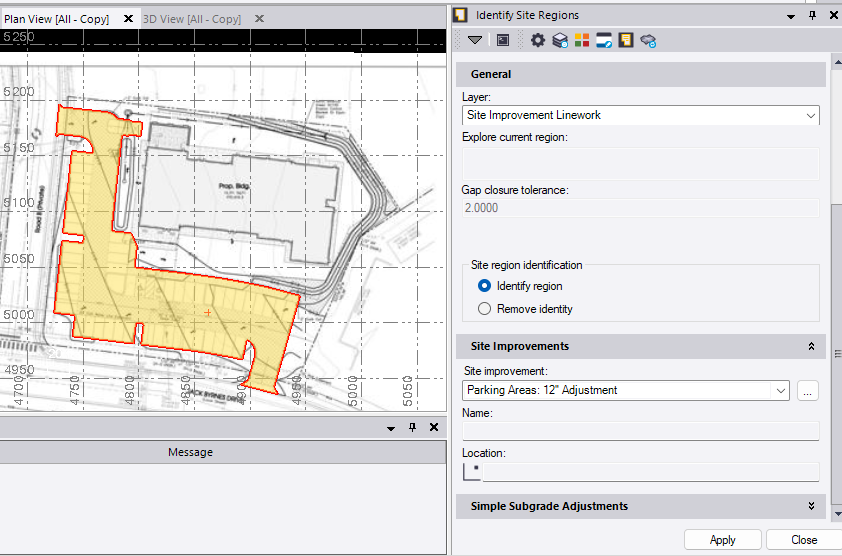
Site improvement Linework is categorized in design layer and "contains potential site improvement boundaries is selected.
-
Site region is identified as a 12" parking area adjustment

Did you run build surfaces to build yout subgrade adjusted finished grade surface?
If you share the file I canntake a look for you
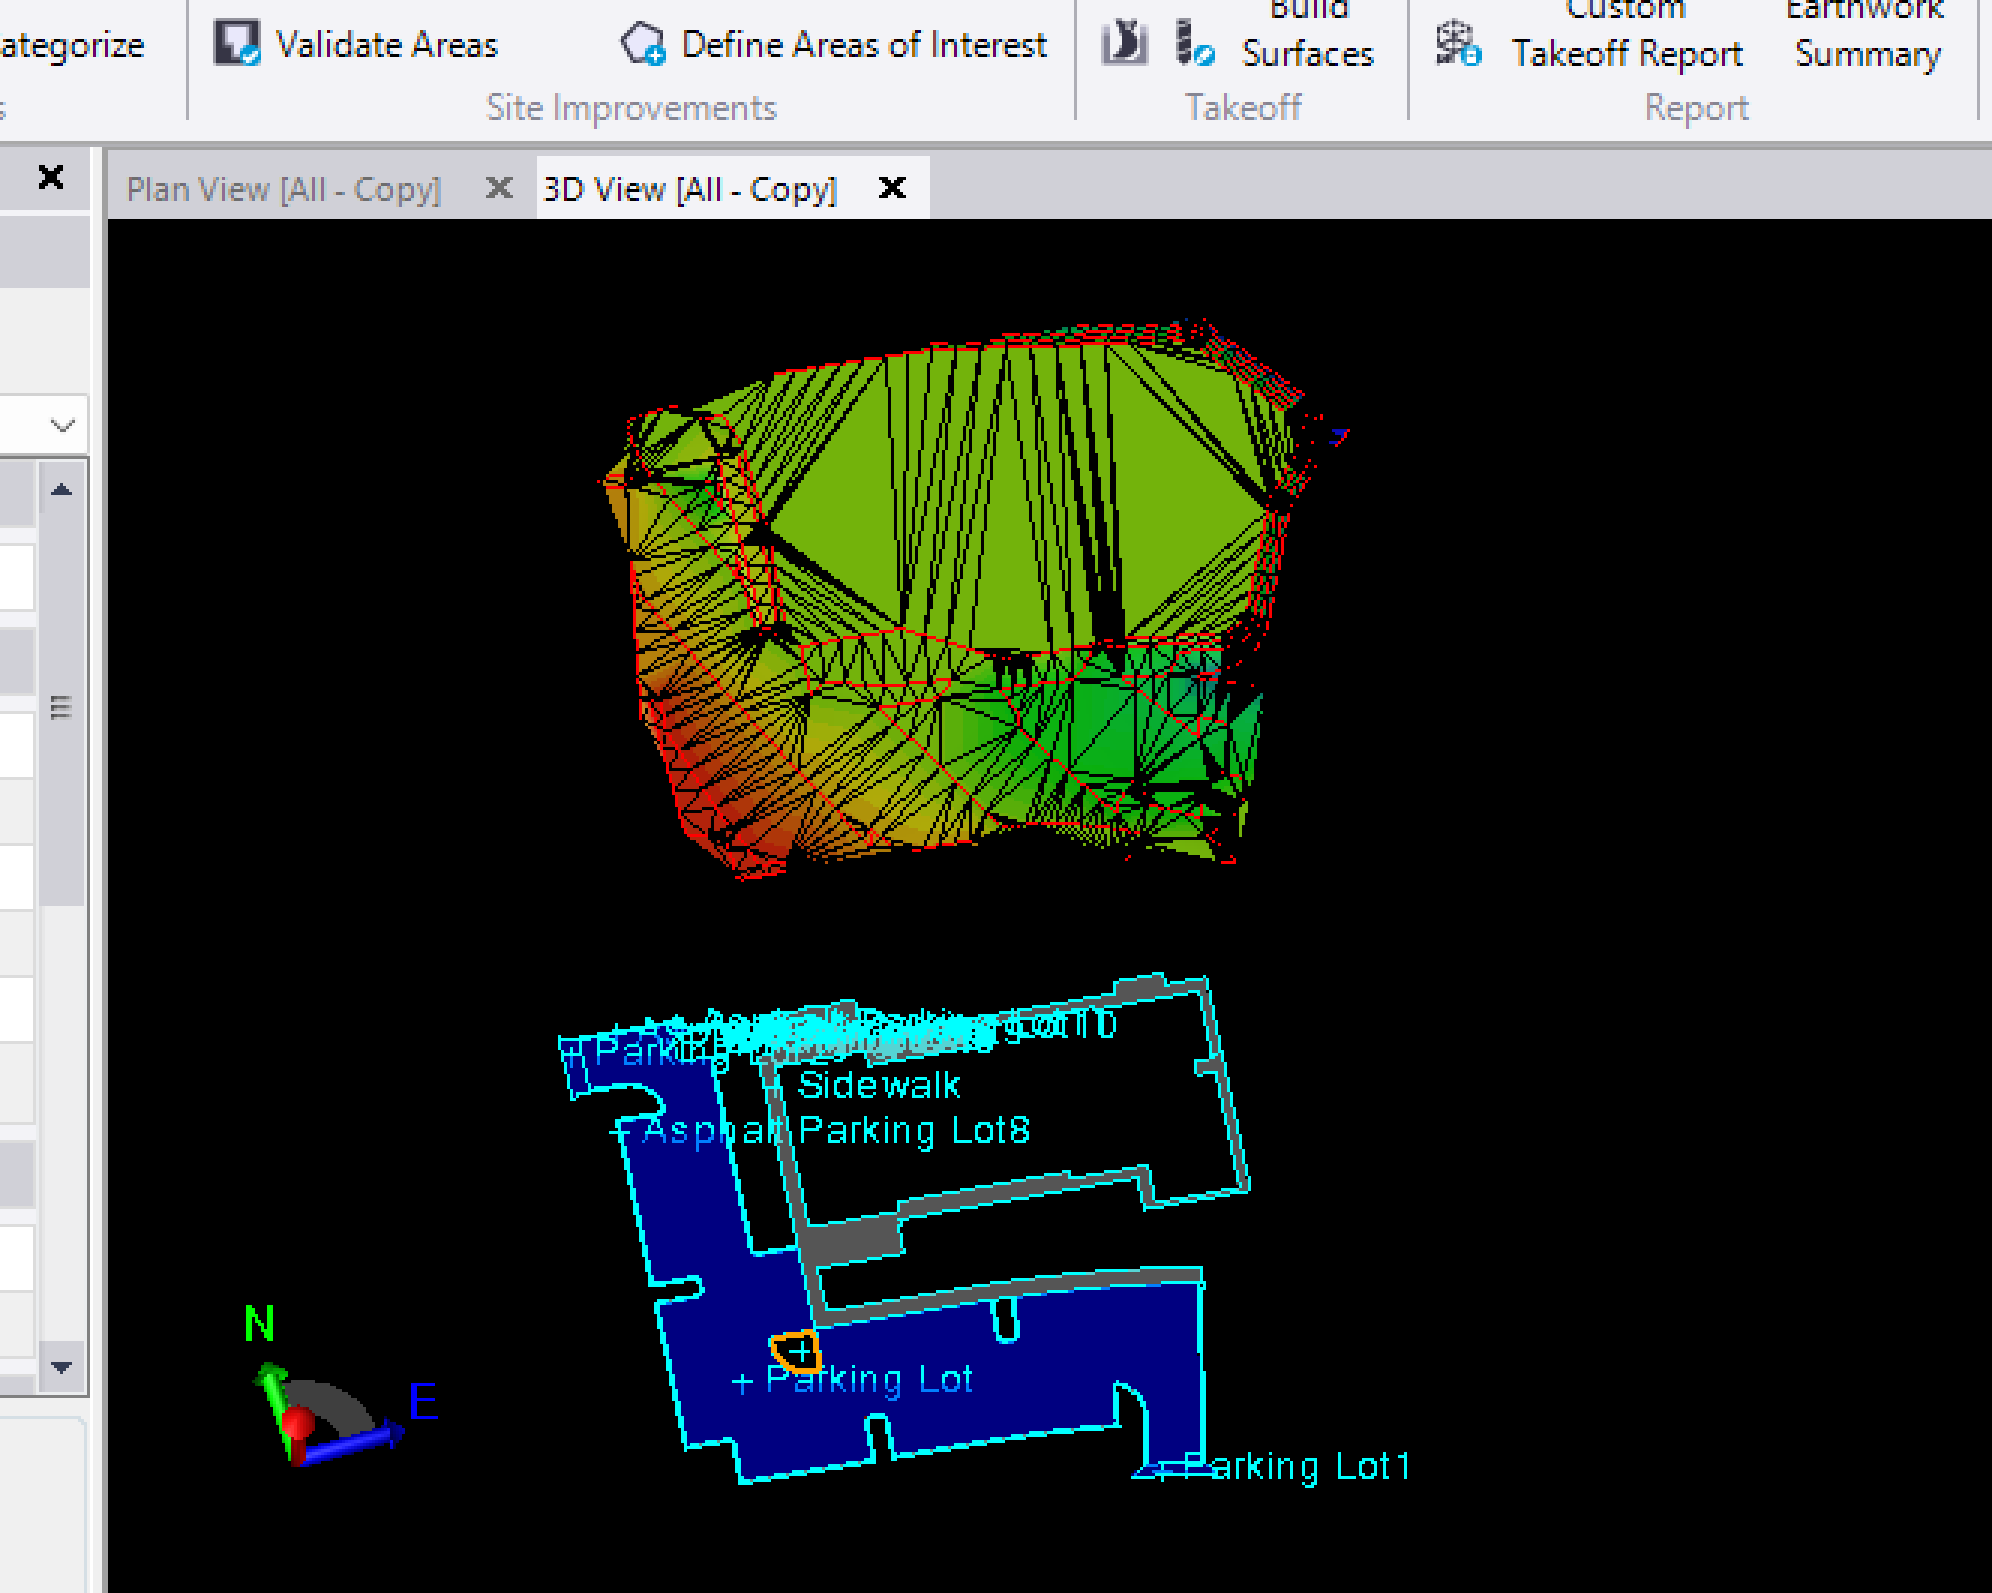
The yellow area shown is the area you are talking about right - it looks.like the improvement is assigned and you juzt need to rebuimd your Takeoff Surfaces to create the Funished Grade with su grades adjusred surface and you should be good
Alan
Also make sure that your surface properties for the Finished Grade surface is set to Rebuild Method By User or Auto and not Show Empty
Alan
Blue Marble 2.vce (481.5 KB)
Alan-
I did rebuild takeoff surfaces and rebuild method is auto. I was able to create a similar file with no problem using existing vector pdf linework just this morning. I appreciate you sticking with me to figure out my mistake…this program has been frustrating for me for the last year due to lack of support, I just muddle my way through it!
Thanks,
CJ
I hear you CJ - That is why we started Rockpile Solutions to give just that support that is missing elsewhere. The issue that you have is this - you don’t actually have a Finished Design Surface Model from a Takeoff perspective. The only line that shows up when I look at the Linework Categorized as Design is the Parking Lot Boundary and that is 2D so it cannot create a surface from it.
I created a video for you that shows you "the error of your ways and how to fix up the model to get what you need.
There are two approaches to fixing your issue
-
Categorize the Layers that you have 3D data in as Original and Design so that TBC Takeoff can build the surface models from those lines
-
Relayer the linework that you have on the uncategorized layers to the layers that you have already got categorized in the template.
Both approaches bring you to the same point - 3D Lines on layers that are categorized for Existing or Design that can then be built into Surface models.
once you have your Finished Grade Model created then the Subgrade Adjusted Finished Grade Model can be computed - the Subgrade Model can only exist if there is a Finished Grade Model above it - the top NW corner of the job is an issue because there is no Design Linework that has 3D in the project - so I created an extra line that takes from the Existing Contours in that area (because the entry way has to tie to Existing in that location) to extend the Finished Grade out to the end of the entry driveway to show you how to do that.
The resulting Model is attached so you can take a look
Video shows you how
Finished Project
Blue Marble AS Finished.vce (1.0 MB)
2 Likes
Alan-
Thank you soooo much! I didn’t realize that the contours also had to be categorized, presumed that the site improvements would just be applied to the surfaces built. I completely understand why the program is doing what it is doing and where I went wrong. This is not something that I would have said for at least another 2-3 weeks on my own.
Last question for you and I have the tools I need to get through this one! Would you create a surface for the building pad at exact elevation and add as a surface member on FG Contours or would you do a site improvement as well?
Thank you again for the quality of your response and the unexpected quick turn around!
Alan,
Is there a way to create a subgrade surface using a surface made from corridors and grade break lines?
Yes
when you create the surface in corridors, each node in the corridor that creates a feature in the road model acts as a texture boundary.
You can use the Apply Surface Site Improvement Command to apply a Site Improvement to e.g. the Pavement areas or Shoulder areas of the corridor surface model. Once applied you can then use the Create Subgrade Surface command to create the subgrade adjusted corridor surface model at the material interface(s) that you want to create surfaces for e.g. Base of Asphalt, Base of Aggregate, Bottom of Engineered materials etc.
To create the Materials and Site Improvements use the MSI Manager (Materials and Site Improvements Manager) command.
There are videos on this on the forum - I will see if I can find the right link for you.
Alan
Here is a link - the last video in this post covers what you are asking for I believe
https://community.myrockpile.com/t/corridor-subgrade-modeling-videos/1523
Alan
Alan.
Thank you for help.