The controls to create and modify Map Layers are only available to users with the following permission levels
- Community Admin
- Organization Admin
- Project Manager (See project Manager and Engineer Post)
- Engineer (See Project Manager and Engineer Post)
All other permission levels (Project Viewer and Work Supervisors) have access to the Map Layers to turn them On and Off as required only.
In this set of controls you can define the setup for your map display overlays. Once created they can be switched On / Off using the Map Overlay controls from the Map Screen.
If you have the appropriate permission level you can access the Manage Map Layers function from the ![]() menu.
menu.

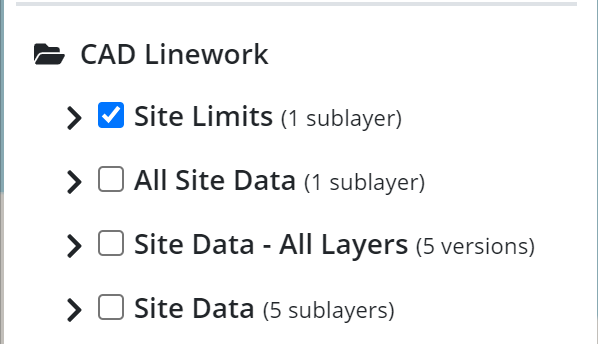
The Map Layers are organized into Folders, Layers and Sub Layers.
You can turn information On / Off at the Layer or Sub Layer level.
Map Layers will typically hold one of the following types of information
- Georeferenced Aerial Imagery from Drone Flights (JPG/JGW/KML or PNG/PGW/KML)
- Georeferenced Images of PDF Files or Schematic Maps (JPG/JGW/KML or PNG/PGW/KML)
- Linework Files representing site features for reference and orientation (KML)
- Linework files for designs provided to give linear feature context for the designs (KML)
A Map Layer can contain one or more sub layers of information. Each sub layer can contain a specific set of data that you want to turn on / off independently or as a group.
For example you may upload linework in the form of KML files generated by Trimble Business Center. A KML file can carry lines, circles, polygons (with shading) and text objects including their colors as defined in Trimble Business Center.
Note that each KML file can be turned On or Off individually, however the Earthworks System does not provide for object level or any inherited layering of the data from TBC or other system (e.g. Google Earth) on / off switching. If you require a “layering of data”, we recommend that you export each layer or group of data from TBC as a separate KML file, and then load those KML Files as sub layers to a Map Layer control in Earthworks. This will provide the desired layering of information.
You may elect to break the linework up into multiple layers for different types of information e.g.
Project Limits
Project Sections
Project Phases
Project Utilities
Project Haul Roads
Project Stockpiles
Project Ponds
You can create folders in which to store your map overlay information. You can create as many folders as you need for different types of information. Each folder that you create will appear as a folder in the Map Overlay Controls function. Within each folder you will find the Layer of the type that you have defined (See below).
Within the Layer you will have either
Sublayer versions showing one date/time at a time:
A selection of date based displayable options controlled by radio buttons - allowing you to see one of the available layers only at a time.
An example of layers with radio button selection

Each sub layer in the list will have a date and time that it represents. This is used for example for Aerial Imagery where you may have a different image tile for each month end survey. In this case you would have a folder called Aerial images, and then within that folder you may have a Layer called Drone Flights and have it set to this type of layer. You can then add any number of image files to the layer as sublayers - each image / sub layer is given a Date that it represents e.g. 9/30/2021. If you load drone imagery for each month of survey, then you will have a list of dated images that you can elect to display one only at any time from this layer.
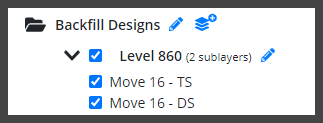
Multiple stacked sub layers shown at the same time:
A selection of displayable options controlled by checkboxes - allowing you to see a combination of layers
An example of Stacked Layers with Check Box selection
Within each folder you can upload the overlay data that you want to use on your map display. The file types that are currently supported include
.KML
.JSON
.GEOJSON
.TIF
.TIFF
.JP2
.PDF (GeoPDF only)
.ZIP (for paired files) e.g. TIF/TFW/KML or PNG/PGW/KML file triplets
For normal PDF pages, Georeference them in TBC as images and then use the Earthworks Work Orders Command - Image tab to create the images and upload them to the RPS Earthworks System as a Map Layer
You can create linework and polygons in Google Earth through use of the Add - Path or Polygon commands and then use the Right Click from the object(s) in the tree view to select Save Place As and then define the KML file and save the file. This will generate a KML file that can also be uploaded to Earthworks for GIS level information.
For example you may have a folder for Aerial Images flown at different times for the project. In this case you would create a folder called Aerial Imagery. You may then have layers for 2022 and 2021 imagery. You will then have sublayers for each image that you created for each survey that you carried out.
Once created you can click on the Edit button to change the folder name if needed.
Click on the layers button beside the folder to create a Layer within that folder group and give it a title. Select the type of Layer that you are creating - use the “Multiple stacked sublayers shown at the same time”
Now you can create a set of Sub Layers onto which you can place either images or KML linework files.
Use Case Notes:
For TBC to be able to write a KML file, the source TBC project must have a Coordinate System and or a Site Calibration for the project loaded. Once a coordinate system is available, TBC can convert local site coordinates into WGS84 positions for the Earthworks system.
To create a KML file from Trimble Business Center you can use the Export - GIS - Google Earth KML Exporter function. This allows you to make a selection of data and write it to a specified KML file. You can run the exporter multiple times to create all of the KML files that you require.
To load imagery from TBC use the Earthworks Work Orders - Images tab to build the images and load them into the RPS Earthworks system as map layers. You can capture images of e.g. PDF pages, aerial imagery, CUT Fill Maps etc.
Once the Map Layers have been created using the Manage Map Layers control, if you return to the Map view by clicking the MAP button in the top left of the Map screen, you can access the Map Layer controls using the Map Layers button in the lower right corner of the map screen.

Expanded Map Layer control
