In this post we will cover how to publish a Cut Fill Map to Google Earth from TBC.
Data that can be published to Google Earth
Lines (including Polygons, rectangles, circles, polylines, linestrings etc.)
Text
Alignments
Contours
Lines and Text will carry the color of the source data from TBC whether the colors are specified as a specific color or By Layer.
Cut Fill Maps - if you select a Cut Fill Map the Text of the CF Map along with the 0 contour of the CF Map are exported, however Text coloring is set to Black - the map will not carry the text colors for Cut and Fill if applied. The Cut Fill Map colors will not be transferred this way - use the Capture Image command to publish a Cut Fill or Site Improvement Map or an Ortho Photo etc. to Google Earth.
Surfaces TINs - Explode using Extract Surface Features to create 3D lines and then select those and export to Google Earth. Note that if you export at Absolute, anything below the terrain in Google Earth will be invisible. If you raise all lines using Change Elevation Command then you can send them out as Absolute vs Clamp to Ground and get a 3D view that works well - it is high comparted to Google Earth but you can see it in context.
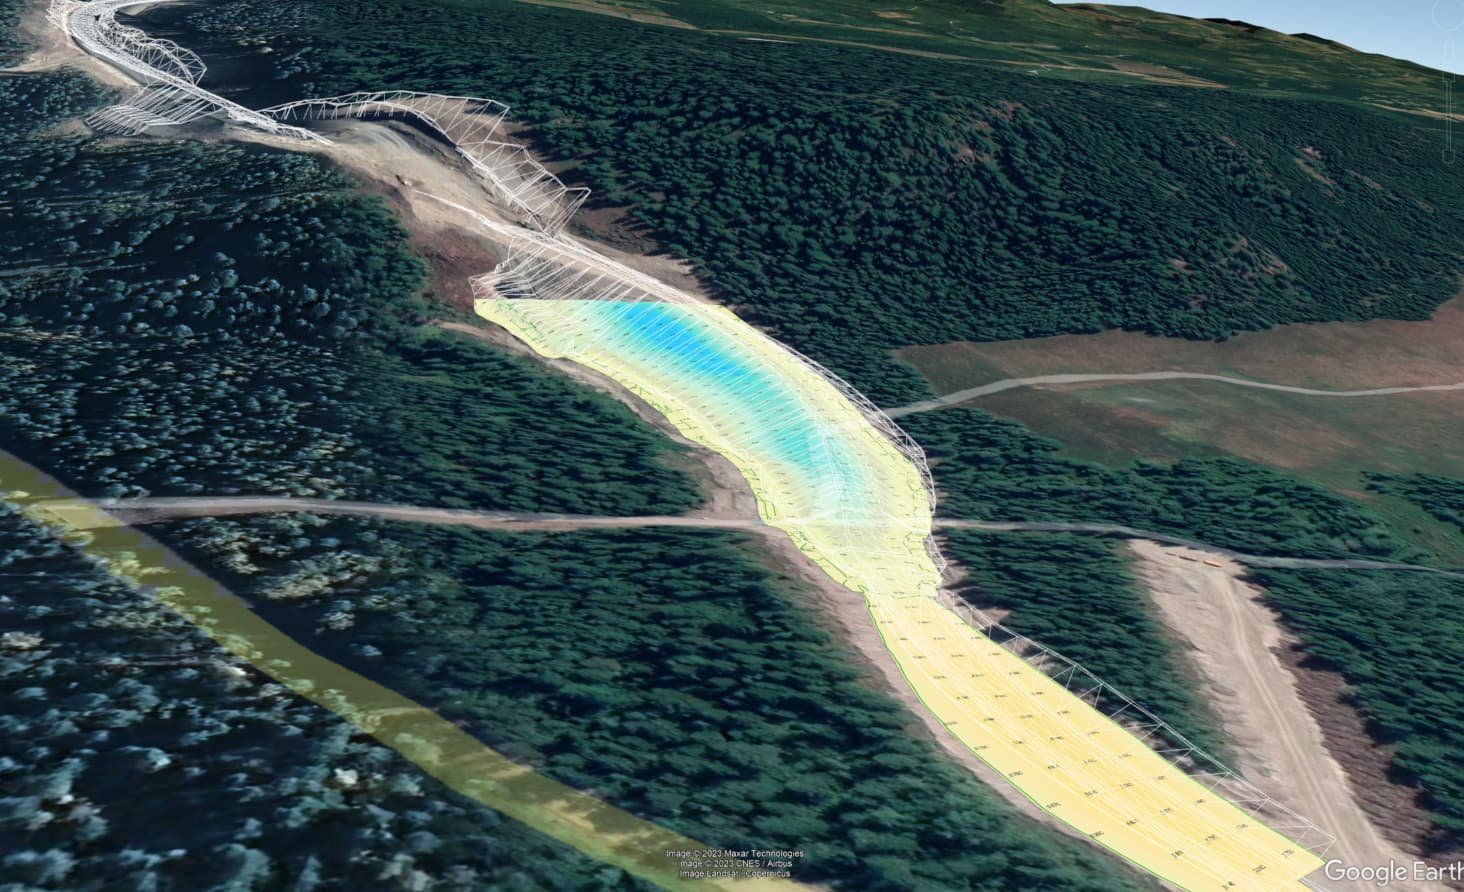
Cut Fill Maps - Place a Plot Box around the area of the Cut Fill Map and then use the Capture Image Command to capture an image in PNG format (because of transparency support) - this creates the image in the Project Snapshots folder with a KML sidecar file. Find the KML file in the snapshots folder and double click it to load the image into Google Earth. If you want to see the Text of a Cut Fill Map in Google Earth you may need to use a smaller plot box and 300 DPI vs a Larger Plot box and 120 DPI resolution. 120 DPI allows you to capture a larger plot box area in Capture Image command at lower resolution which is good for the coloring of the Cut Fill Map or the Site Improvement Map for a Project, however text will be a little blurry or unreadable vs a 300 DPI image which is highly readable
Image below shows a TIN Model and CF Map captured at 300 DPI placed in Google Earth for a Project in construction (Google Earth imagery is relatively recent).
Maps / Images that can be published to Google Earth
PDF File Images (Use Capture Image command)
Cut Fill Map Images (Use Capture Image command)
Site Improvement Map (Use Capture Image Command)
Ortho Photos (Use Capture Image Command)
An image format like PNG or TIFF or JPEG has a finite size per image. The image can be published at 96, 120 or 300 DPI, however with increasing DPI, the image area has to decrease to maintain the required image resolution. Scale also plays a part in this process as far as TBC is concerned i.e. a Plot Box is defined in Inches or Meters at a scale i.e. a Plot Box which is 10 inches by 10 inches at 50 scale will be 500 x 500 feet on the ground in plan view. at 300 DPI this becomes 300x10 by 300x10 Pixels ie 9,000,000 pixels.
Key Points
- Always use a .PNG file as the output format from the Capture Image Command because that has Transparency and looks the best in Google Earth.
- For images use the Clamp to Ground Option to drape the images over the Google Earth Surface
- For linework and text, either use Clamp to ground to drape the lines / text on the Google Earth Surface so that you can clearly see the data, or you can raise the data in TBC using the Change Elevation Command so that it will sit above the Google Eartjh Surface in Google Earth.


