The CAD or PDF Section conversion process allows the conversion of Section based linework in the Plan (CAD) or Sheet view (PDF) into 3D Linework or 3D Stored Sections. With the recent addition of 3D linework to this process, my recommendation is that the 3D linework is a better solution for most things than the conversion to stored sections. Stored sections can be used in the Corridor Templates to see the designers intent at the stations where they are defined, and they can also now be exploded (5.21 of TBC) into 3D linework, however for Takeoff and 3D Modeling, the 3D linework provides a greater control on the overall process and models that can be produced.
There are a large number of variations of cross sections depending on which software produced the sections, the setup that the source engineering firm / DOT applied to the cross sections creation, and also the regional standards that you work to with the software. The current tools are developed to support three main types of section as follows
No Grid Section Type

Single Section Type


Multiple Section Type

Note that sometimes the Multiple type of sections can be presented in two connected columns as shown below. In this scenario you would need to edit the sections so that there is a gap between the two columns so that they can be processed using the Multiple Type approach. Use the Clip Lines (Break at intersections) command followed by Delete Lines to address this requirement.

Other Types of Section
Other section types can be supported only if you first manipulate the data to make it fit the above types. This may involve creating some additional linework, deleting or removing some linework and doing some specific interpretations of the data. This tool has been advanced significantly over the past 2 years and continues to evolve, but it handles a wide range of types already and will continue to advance into the future.
The sections data in 3D can provide additional value for office staff building 3D models and carrying out highways / railways estimating as well as be used as a basis for estimating purposes. It can also be used in tools like the new SiteVision Augmented Reality system for field supervisors.
Problem Solving (Known and Identified Issues)
There are so many variants of cross section data and also so many variants of quality of data included in the cross sections files, that it is almost impossible to trap every corner case. Having said that, thee are some commonly encountered issues to look out for, and how to solve for them to increase the likelihood of success.
- When we sort the data selected into separate cross sections, we use the min max coordinates of the grid lines to define the base box in which we search for the data. Then we add the Maximum Grid Text Distance from Grid setting to increase the size of the search box. However in some cases, that can mean that the section areas overlap and that creates ambiguity and can cause the process to fail. To avoid this, especially with e.g. PDF Sections where you may have one column of 3 sections per page, you can move the uppermost sections using from 0,0 to 50,0 and then do the same for the middle sections from 0,0 to 25,0 so that you add more of a gap between the sections - this alone can help improve first pass conversion to work fully.
- In some cases I have seen cross sections that are well spaced apart, but the section data for the surfaces lies above or below the highest or lowest point of the vertical grid lines. Since in (1) above, we search for the data to convert within the Min Max coordinates of the grid, this can mean that some of the data doesn’t get converted / processed correctly. To solve this issue you can either
- Increase the length of the vertical grid lines so that all of the section data falls within the length of the vertical grid lines or
- If there is sufficient room above, below and to the left and right of the sections, you can enter a larger value for the maximum grid text distance from grid to make the search area larger and more likely to catch all of the linework to be processed. If there is insufficient room around the sections, then you should try to move the sections in order to make more room around them.

Data Above the Grid Lines[![|445x173]
Data Below The Grid Lines
- Often duplicate data exists in the sections - common duplicates that I see include
- There is often a rectangle around each section (single style) in addition to the edge grid lines. These can often be on the same layer as each other. I cannot say categorically that this is a problem, however trying to ensure that these are not there can help in certain scenarios. Delete the rectangle from the grids.
- There are often duplicate Grid Lines - often the zero offset grid line or the base elevation grid line can be duplicated. Again delete the duplicates where possible leaving only a single grid line in all locations
- There are often duplicate labels for offsets, elevations or station labels. Try to make sure that you don’t have duplicate text items.
-
Missing data - quite often you may find missing elevation grid or offset grid or station labels. They may be missing or simply on the wrong layer. Make sure that all of your sections have all of the necessary data to convert the sections.
-
Sort data out into separate layers - keep the Grid Lines, Offset and Elevation Grid Labels and Station Labels on separate layers. Check the layers to make sure that there is no extra text on the Grid or Offset Labels or Station Labels as that can stop the conversion from working
-
Sort out your section linework into separate layers as well - separating them into layers in the Plan View before conversion is the best approach in my experience.
-
When you look at the Section Lines, look for lines that form closed polygons (like pavement areas and subgrade areas, and if you want to make surfaces from them later you likely want to use Explode Lines command to split them into Top, Bottom and Sides on separate layers. The Explode line command allows you to use a Break Angle limit, so that small changes in direction of lines do not get exploded (typically you want to split the Top and bottom away from the sides so use a break angle of 45 degrees or higher to achieve that. if you then want the Right and Left side of the pavement separated so that you can later use the Track Line Edges command to find the longitudinal lines between the sections - then you can explode the lines as a second action with a small break angle to find the Left / Right divide.
-
When you look at the labels on each section, I recommend that you delete the left and right most offset labels and the lowest elevation label on the grids so that no confusion between offset and elevation can happen.
-
Separating data in the plan view prior to conversion to 3D is going to be easier and quicker than doing it in 3D later
-
I have also seen cross sections that are maybe in 3 parts. The sections are extremely long, and instead of drawing very wide sections, they have been broken into parts and wrapped into a single column of sections - but in pieces. In order to process these, you will need to move the parts so that they form a continuous section before processing.
-
I was recently sent a set of sections that would not process - it turned out that they were rotated from square by 13’ of arc and that causes the processor to fail - check the East West and North South grid axis orientations to make sure that they are 0-180 and 90-270.
-
If the section data has UCS (User Coordinate System) defined on the elements they will not process.
-
The processor only needs Elevation Labels at one end of the grid lines (I always delete the Right Side if I have both left and right side labels. The processor only needs Offset Labels at one end of the grid lines. (I always delete the top labels (if present) leaving the offset labels along the base of the sections.
-
The offset labels can be all positive (both left and right side of the alignment, or they can be positive to right and negative to left. Either works and both are supported.
-
Station / Chainage Labels can be above or below the sections. They can be inside or outside the provided grid data. The labels can include the special Station / Chainage indicators + or / etc (10+00.00 or 10/00.00) however the appropriate Station / Chainage indicator needs to be set in the Project Settings, Units, Station settings as shown here
-
When we process the Grid Text (Elevations and Offsets), we are looking for Text with Rotation Angle of 0 or 90 or 270 or 180 only (there is a tolerance being added to address this issue (Mar 2020)), but it is possible to get Text that is off these axes of rotation. Check the rotation properties of the text to make sure that it is in one of these cardinal directions before using it for conversion

-
I have also seen times were the Vertical Grid Line does not quite reach down to the horizontal grid line and this causes the Sections not to process so check that the Grid Lines intesect - we made a modification for TBC v5.3 to trap this one.
-
I have also seen (linked to (17) that the Station Label that is meant to be below the Grid Line actually has its insert point (Top Middle) just above the Horizontal Grid Line - because the Vertical Grid (zero offset) is a little short and someone snapped to the end point etc.
Working with PDF Sections Data
When working with PDF Cross Section pages, you will use the Import command, select the PDF file, and then Import the PDF Sheets into the TBC Sheet View. In this case, you will name the Sheet Set that you are creating, and you will find the imported Sheet data in the Project Explore under the Plan Set section. I recommend that you limit the number of pages that you import into one sheet set to a maximum of 10-15 sheets. The Multi Sheet View is really useful and fast to work with, however when you have more than 10 - 15 sheets, its effectiveness diminishes.
Scale the PDF Sections
When you import the PDF Sheets, the vectors in the PDF file get extracted automatically and the scaling of the sheets is as per the PDF file. This however means that the Sections are very much smaller than the real world sizes, and that very small features in the real world data are reduced to nothing or very small distances in the PDF File. TBC has a tolerance of 0.1 mm when you start to edit a line, if it finds two nodes closer together than 0.1 mm then it will delete one of the adjacent nodes automatically. For this reason, it may be advantageous to scale the imported PDF data up to full size using the Scale command before doing any edits to any linework.
Join Dashed Lines
During import of the Vectors from the PDF file, we recommend that you check the “Join Dashed Lines” check box. This converts the imported dashed lines into solid lines that are easier to work with. Sometimes grid lines can be dashed, existing terrain sections can be dashed or other linework can be dashed. This will save you having to resolve this issue after the fact.
How PDF Layers are Managed
PDF files that are layered will be imported onto the same layers in TBC. PDF files that are not layered will be sorted into TBC layers based on the linestyles and lineweights of data in the source PDF.
How To Solve for Polyline Text
In many PDFs you may find that the Text that we need for the conversion process (Station Labels, Offset Labels and Elevation Labels) are written as
- Text (This is good and what you want)
- Text and Polyline Text (Still Good and the Text is what you want)
- Polyline Text only (not good - this is not what you want and you need to use the below workaround before the data can be converted into 3D).
Work Around for Polyline Text Issue
When you have polyline text only, then you have choices on how to proceed - the following are what we support
- Station Labels are required on each Section in order to place it in the correct location. We created the Increment Text command to make this easier and faster. The command allows you to set an initial value e.g. 1000 and an increment value e.g. 50 so that you can simply click on the end of each Offset 0 line to place the station labels. Set the Layer (I use CADXS-Station Labels) and Color (I use Green) and then just click each Offset 0 grid line endpoint - always use the Top or the Bottom (I use the Top because the Offset Labels are typically at the bottom), and then use Station Labels are “Above” the sections.
- For Offset Labels, you can change the Section type from Single to No Grid type so that you only have one Vertical Grid Line and one Horizontal Grid Line for each section. When you have this, you can change the elevation for Offset 0 lines to Elevation 0. Use Properties pane or Change Elevation command to do this.
- For Elevation Grid labels - the same approach applies. You can set the Elevation value for one grid line to the elevation of that grid line.
- If you do 2 and 3 above, these will be used in combination with a Horizontal and Vertical scale to size the sections correctly. You can elevate 2 grid lines and two offset lines, and then the Scales can be determined by the process.
- The alternative to 2,3,4 above is to actually add your own elevation and offset label text to each section so that the process can operate in the normal manner.
There is no limit to how much linework can be converted. We currently only convert linework. Blocks, Text and other CAD objects are not converted by the Create Stored Sections from CAD command.
Units Issues
Remember that when you work in the Plan view, the units of the plan view are either Feet or Meters. When you work in the Sheet view, the units are either Inches or mm. When you enter the Maximum grid text distance from grid value, you can use the inbuilt measurement tools to measure the distance from the end of the Grid Lines to the Insert point of the text (use insert point snap). This will ensure that the distance measured is in the right units for the input dialog. if you enter too larger value in this field it will fail to process the sections because you created ambiguity between the sections. If you enter this value in too small, it will fail to process because it cannot find the text required to process the section data.
Adding Data To Sections
If you have over excavation to carry out and want to create models for that by adding the overexcavation detail to the plan or sheet view sections, you can draw the linework onto the sections prior to conversion process, and convert them in the same way as the imported linework.
Reprocessing Sections
If after processing the data when you start to manipulate the data to create surface models in the 3D world, you find that you need to make some changes to the way that the data is structured (explode lines or break lines etc to make them easier to process, then you can simply delete the section data in the 3D View / Plan View and reprocess the sections after rectifying the problem(s).
Track Cross Sections
In some situations, you may find that you want to create a Top or Bottom surface across a set of selected linework to create a composite section - the Track Cross Sections command allows you to do this in an automated way for one or multiple cross sections in a single pass.
Modeling in 3D from the Converted Linework
Once you have processed the sections to 3D you can work on the data in the Plan view or 3D view.
Drawing 3D Lines
You can use the Breakline or Linestring or Quick Line TML to create linework by snapping to end points or nodes on converted linework to create longitudinal features as needed.
Walls and Barriers (Vertical Faces)
If you create walls or barriers where the provided sections have vertical sides and create flags in surface models, you can use the Nudge Line command from Rockpile Solutions to nudge a line sideways (while keeping it in the surface model and correcting the vertical face flags). You can also use the same command to nudge nodes in a line forwards or backwards to fix a vertical edge in a section line, again allowing the section line to be used in a 3D Model without causing flags.
Longitudinal Feature Lines
You can use the Track Line Edges TML to track the edges of selected section lines e.g. a top of pavement line set. This command tracks the Left and Right edge of a selected set of lines and forms linear strings along the corridor. It will also optionally create a closed boundary around the strings so that you have a boundary line that can be used to create surface boundaries, in situations where a single surface of a corridor may be formed of several “islands” you will need these boundaries in order to accurately model the surfaces.
Corridor Models
Once you have created all of the 3D linework that you think you need, you can add the surfaces that you have created to a corridor model. Each surface can have a material layer defined above the surface, so that you can compute all of your subgrade and earthworks quantities. The corridor model also lets you fly through the project and see all of the sectional areas from which the volumes will be derived. This is a useful check on the quantities.
Surface Model Densification
In some corridor projects built from sections, the data lends itself to making the surfaces Alignment Based and densifying the surfaces (Surface Properties). When you do this, the corridor that may be made up of 50’ spaced cross sections can be improved to model through horizontal and vertical curves.
Corridor Model Volumes
Remember that if your Corridor is made up from 50’ cross sections, that you should compute the Corridor Earthworks quantities on those same 50’ cross sections. Computing on a 10’ or 20’ etc interval is pointless when your source data is at 50’ intervals. In addition computing at anything other than the source interval is likely to introduce more errors into the computations.
If you want to break your corridor earthworks volumes into areas (Phases or MOT Areas) you can add multiple boundaries to the Corridor Earthwork Report to break out the quantities into the areas required. If you do this make sure that your areas do not have the following shapes that can be sliced by the cross section area processor
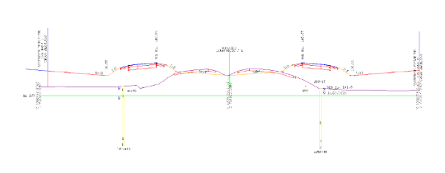
Alignment and Sections Locations in Graphics
Note that if you import CAD Sections into the Plan View they will typically be located at or near the 0,0 location in the plan view. If you then import an alignment in state plane or local coordinate system coordinates into the same project, the two sets of data can be a long way apart in the software. In this case I would select all of the Cross Section data and move it graphically closer to the alignment so that it is a) easier to manage and b) does not cause graphics issues because of the huge coordinate separation of the graphic areas.
Alignment For the Conversion Process
The alignment for the conversion needs to have at least a horizontal alignment. The vertical alignment is not needed. However, if your road / corridor has significant elevation, you will find that it is better to at least elevate your vertical alignment to the elevation of the project data so that they appear together in the 3D view. You can enter the start station with an elevation and the end station as a grade break and that will suffice.
If you do not have an alignment, you can create a dummy alignment of the station range of the project - that dummy alignment can be a single straight line element going North South or East West, and that has a Vertical Alignment with elevation close to that of the project elevation.
I sometimes start the alignment at -10 from the origin of the sections, so that the first section is computed and placed correctly.
Note that if you later get the true alignment, unless you converted the data to stored sections, you cannot change the alignment and have the data move to the new alignment if you are working with 3D linework. You can do that with Stored Sections.
UK / Australia Style Sections
UK Sections such as these shown below will not process directly, but through following the guidelines above can be forced into the No Grid style and then processed into 3D Linework.

Invalid Station Labels:
If you have station labels like IH35 STA: XX+XX.00 these will fail because there are two numerical values in the station label. Use the RPS Affix Name command to remove the IH35 STA: from the start of all of the selected station labels.
I will add more notes to these as and when I encounter other issues that may cause sections to fail to process.
I hope that this blog helps you to process your sections faster. In my testing I have found that I can convert data this way from CAD or PDF Sections in a few hours compared to a few days. The modeling process on the back end is easier, faster and far more rewarding than digitizing cross sections. Because the data is CAD data it is extremely easy to manipulate and with the 3D editing improvements made in v5.2, this is a vastly superior process for working with cross sections.
I will try to add some process videos to this - here is a link to the Power Hour webinar that I did on this subject that shows the PDF workflow.